Every visitor to your site, whether they have an account and log in or visit the site anonymously, is considered a user. A User, whether an Anonymous user, or someone logged in is granted access to the site based on the Roles their User account has. Each Role is given specific permissions based on the requirements for user access. A User can have one or more Roles depending on what access you want to give them. Currently, as public access is disallowed, your site has 4 basic Roles; anonymous, authenticated, editor, and administrator.
User Roles
- anonymous - These users represent any user accessing your site without being logged in. They can view all your sites published content and contact you using the site contact forms.
- authenticated - All Users with an account on the site are automatically given the Authenticated user Role. This Role has little more access than an anonymous user.
- editor - Site Editors are those users allowed to manage the site content, site users, media, and more. They can add, edit, and generally manage all your content and information.
- administrator - These users have full access to the site, it's settings, and features. This role should be limited to a select few users as there are major security implications for these accounts.
User Management
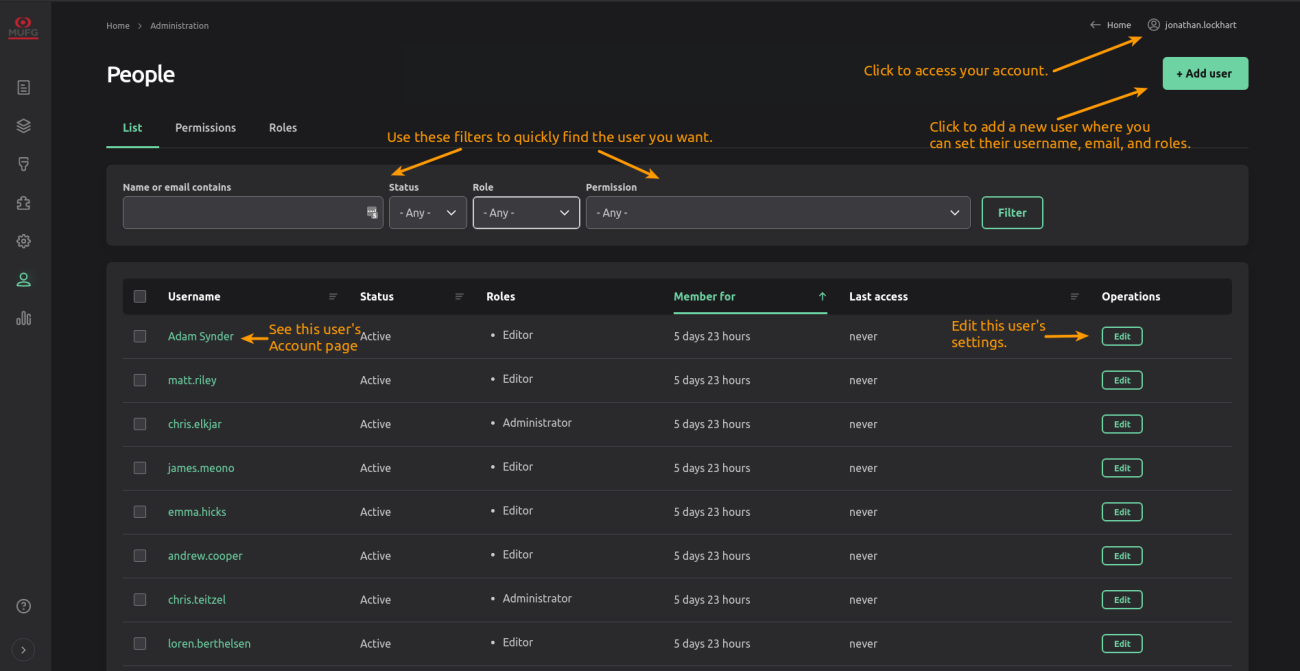
To see what user accounts are on your site and manage their information or access, go to People (admin/people). This table allows you to add users, filter the table to a specific set of users, and update user accounts.
- The table can be sorted by clicking the table header links.
- The users in the table can be Filtered by using the Username, E-mail, Status, Role and Permission form elements. You can filter by user Role, a specific Permission, or by Status. Simply select the filter setting you want and click Apply.
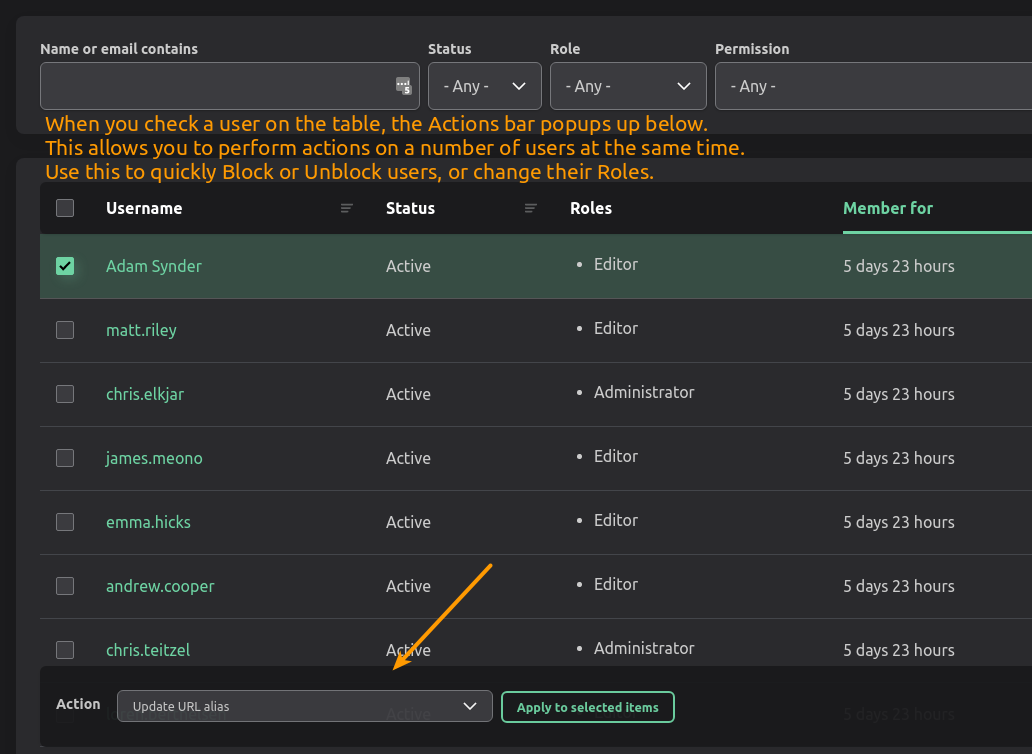
- You can use the Actions to quickly update one or more users at a time. Select the Users you want to perform actions on using the Checkbox next to each Username. The Actions bar will popup at the bottom of the page. Then select the Action you want to perform and click Update. You will be asked to verify that you want to perform the specific action on the selected users. There are a number of actions you can perform but here are a few important ones;
- Cancel the selected user; which deletes the account from the site; you can choose to reassign that Accounts content.
- Block/Unblock: if a user is Blocked their account is still held on the site but they will not be able to login. The site does not currently notify the User that they were blocked/unblocked. This can be updated using the instructions below in the User Communication Emails section.
- Change user roles: this lets you add or remove roles to a user account, thereby giving or removing access and permissions.
- Add user: this link lets you create new user account using the User edit form. All User accounts on the site must have a unique email address, no two accounts can have the same email. A user can login with either their Username or Email address. When adding a user make sure to set their Status and Roles. You can choose to notify them that they have an account on the site and how to login by setting the Notify setting. Personal Contact forms should be disabled.
- edit: this link will take you to that Users edit form, where you can update basic information for the user.
- the username can be clicked to view that users account.
User Communication Emails
When you perform various actions on an account, you can have the site automatically send emails to that account informing them of your action. Some examples of these emails are; a welcome email when you create an account, an email if you block or activate a current user (currently disabled), or an email when a user needs to recover their password. You can customize and personalize those emails using the Email form on the Account Settings page, Configuration > People > Account settings (admin/config/people/accounts).
The Emails to pay particular attention to are the; Welcome (new user created by administrator), and Password recovery. Note that sending all but the Password recovery email are optional depending on when you perform the action. These emails use Tokens to replace placeholders with account/site specific information. You can see what Tokens are available for use by clicking the Browse available tokens link. This popup lists all Tokens available to use in the email. Copy and paste the entire Token including the brackets; for instance [user:name] to have the Accounts Username inserted.